Showing posts with label cooperative learning. Show all posts

Wednesday, March 4, 2015

No Worksheet Wednesday Ideas and Link-Up


I am so so excited to be linking up with The Primary Chalkboard for the No Worksheet Wednesdays series!  How did this idea start?  It was the idea of the amazing Christina, from Sugar and Spice with Miss DeCarbo.  She had just returned from the National Reading Recovery Conference, and had picked up a few professional reading books.  Among them, was the book:


A lively and interesting discussion followed, and we all agreed that it was time to go "back to basics."  So here we are!  Future link-ups will be held on these dates:

March 11th
March 18th
March 25th

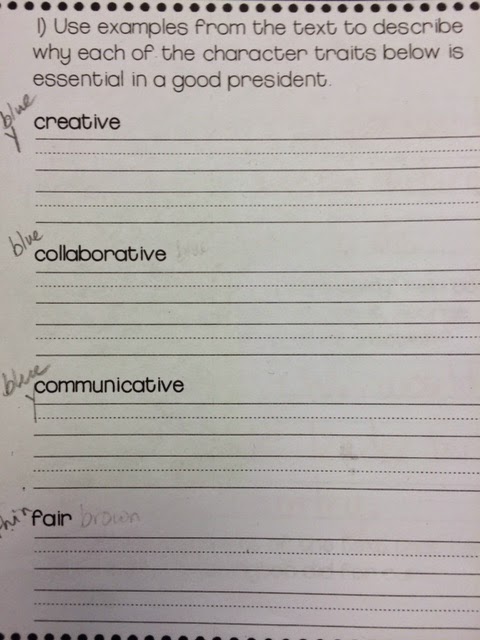
So, what did I do two Wednesdays ago in preparation for this link-up?  Well, we were still working on our Presidents' Day Flip Book.  More specifically, we were set to read and learn about the responsibilities of the president.  I knew I needed to get my second graders to a place where they could accomplish this task on Thursday:
Mrs Rios Teaches: Effective Vocabulary Strategies and Activities - Presidents' Day

So, before we read the text, we focused on some hands-on vocabulary building...old school style, and made Word Posters.  Here's how I did it:  

Mrs Rios Teaches: Effective Vocabulary Strategies and Activities - Presidents' Day

1) Required Skills Mini-Lesson:  Whole class mini-lesson on dictionary skills (abc order and guide words)

2) Guided Practice:  We did a sample poster together. I left it pretty open-ended, and told them they could represent the word in any way they thought would be helpful. (pictures, definition, examples, cut-out photographs, and even non-examples)

Mrs Rios Teaches: Effective Vocabulary Strategies and Activities - Presidents' Day


3) Guidelines and Expectations:  Ok, here is where I botched it up.  We do a lot of inquiry work in my classroom.  Kids are working together on a regular basis. So,  I skipped the expectations talk, and just let them get to work.  Big mistake!  I had to stop our session, pull everyone back to the carpet, and go over our rules for working together.  Here is the poster I have in my classroom.


Mrs Rios Teaches: Effective Vocabulary Strategies and Activities - Presidents' Day

These are the rules that we have come up with together, during the course of the year.  Each time we have a collaborative task, we always wrap it up with a discussion about our "successes" and "challenges".  Students share any issues that came up in their groups, and then students work on coming up with a solution.  We add the solutions to our poster.  This makes the rules relevant and meaningful to my students.

4) Independent Practice:  Students went off with their partners to go create their posters.  They looked up their word in a dictionary, and worked on paraphrasing what their word meant.  I made sure the poster paper was large enough so that all 3 group members could be contributing to their poster at the same time.  By leaving this task open, all students were able to participate.  I loved that even my students who struggle with reading and writing were able to add drawings and labels that represented their word, and made their learning evident.  
Mrs Rios Teaches: Effective Vocabulary Strategies and Activities - Presidents' Day
 All Hands On Deck = A Happy Teacher!
Mrs Rios Teaches: Effective Vocabulary Strategies and Activities - Presidents' Day

Here are a few finished posters:

Mrs Rios Teaches: Effective Vocabulary Strategies and Activities - Presidents' Day

Mrs Rios Teaches: Effective Vocabulary Strategies and Activities - Presidents' Day
Think the poster above is a little bare?  That's ok, because we will add examples and character's names throughout the year who demonstrate this trait!
Mrs Rios Teaches: Effective Vocabulary Strategies and Activities - Presidents' Day

"collaborative"

Their posters were seriously cute and authentic (not perfect), and they loved making them!  As a teacher, the discussions I heard while walking around were rich and meaningful.  Students were negotiating, compromising, agreeing and disagreeing respectfully, and coming to a consensus. 

5) Group Presentations:  Each group was then asked to present their word to the class.  Each student was expected to contribute to their group's presentation.  After the group is done, we use a wonderful idea I got from Stephanie Harvey.  After students share, the audience may respond with:

a) Comment 
b) Connection (In my classroom, this has become "Important Connection", to make sure we stay focused on the big ideas
c) Question
d) I also added the option of "Suggestion".  The audience members usually have lots of suggestions for each group.  

After all groups had finished, I gave all of the groups an additional 5 minutes to add any ideas to their posters.  These posters now hang in our classroom, and are a great focus wall for character trait discussions during our ELA block.

6) Debrief:  Don't forget to go over the "successes and challenges" of working together.

The next day, we were all set to read!  We did a quick review of the words using a Powerpoint that I had made (which I will get into in a future post).  (BTW: My approach to vocabulary instruction is based on the work of Isabel Beck.  If you have not read her book...it is amazing!) Affiliate link below.


With all of this background knowledge about the vocabulary, the students did a wonderful job finding text evidence to complete our reading task, the following day!

Mrs Rios Teaches: Effective Vocabulary Strategies and Activities - Presidents' Day


Mrs. Rios Teaches: Presidents Day Flip Book - writing and reading activities, vocabulary ideas.

Here is a little freebie poster that you could use in your room for having students respond to each other.  This poster works well for all subject areas, including math!  


Don't forget to check out all of these other amazing No Worksheet Wednesday ideas. (click below)


Nicole

Sunday, March 9, 2014

Bright Ideas Blog Hop #2

So excited to see the coming of another Bright Ideas Blog Hop! It was so much fun last time, and I got so many wonderful ideas.  I can't wait to see what teaching treasures I walk away with this time!


So the topic for my post today goes out to all those who have maybe recently acquired a new, fancy, schmancy, interactive whiteboard.  Maybe you have transferred your usual calendar math activities onto said whiteboard, and now you are left with a bajillion calendar cards, of various colors and themes.  Like this!  


Now what are you supposed to do?  Throw them out?  No way! ….

4+ Ways to Reuse Old Calendar Math Cards

1) AR (Accelerated Reader) Testing Management


This pocket chart has a pocket for each student (I use student numbers in my classroom.)  Each pocket holds three cards for each student, with their class number on it.


Green means, "Everything is great.  I have a book, and I am reading."

Yellow cards are put under the "I need to take a test" sign.  Students are trained to put their yellow cards back into their pocket after they take their test, and then notify the next student in line. (Tip: These cards have a little bit of magnet tape on the back!)


Finally, the red card means, "I am out of books, and I need to go to the library."

This system has made AR and library visits very easy to manage.

2) Bathroom Management


When students leave for the restroom, they put their card up.  Now you can account for everyone. When they come back, they can either put it back into a chart pocket, or drop it into a container like the green one above.  At the end of the day, you can chart who is leaving the room, and see if any students are abusing this privilege, or spending too much time out of class.

3)  Waiting For Teacher Management


4)  Pairing Up and Small Groups


Pass out cards.  All the 3s pair up, or all the greens, all the jack-o-lanterns, all the Valentine's hearts, all the triangles, etc…  

5) Your idea here!  Leave a comment at the end of this post with your idea of how you use, or might use, your leftover calendar math cards. 

Now head on over to 

All Things Apple in 2nd


to learn about how Velcro can make your life as a teacher easy-peasy!

You can also check out the linky below!


Wednesday, February 26, 2014

Gave it a Whirl Wednesday - Organization

Yay!  It's Gave it a Whirl Wednesday, the Organization Edition!  


So, I am doing a lot of reading conferences and informal observations, and keeping track of all of my notes and transferring them into my assessment binder (a 3 1/2 inch binder) has been a big hassle.  So, I know I have seen this idea on the internet, and I scoured through my Pinterest boards, but I cannot find the original poster.  If you know who it is, please let me know so I can credit them properly.  Anyway, I tried this just yesterday.  The idea is to write your conference/observation notes on a post-it that is organized into a file folder.  I think the original idea used mini post-its, because I was only able to fit 12 post its in my folder.  But, I think that I might just stick with this size, because I usually end up writing quite a bit.


So, today I used this to do an informal assessment on how my students are coming along with the inferring strategy we have been working on this week. We have practiced inferring emotions, pictures, and short pieces of text as a whole class.  But, today the kids were put into groups, and I put a short piece of text acquired from the FCRR site (Florida Center for Reading Research) at 6 different stations. Below is what I downloaded from the site.  Click on the image to get your copy.


Then, I gave them this response sheet.  You could easily just have kids fold a piece of white paper to make six boxes.  I like this one because it has sentence stems to help my students organize their thinking.


Then, the groups rotated from station to station.  At each station students were expected to 1) Read:  I asked the groups to read chorally because I have a few struggling readers, and wanted them to to have access to the text so they could do the thinking with the rest of their group.  2) Talking:  Students had to share their inference with their group using the following sentence frame.  "I can infer that______ because I see ___________, and I know _________.  The idea here is to enforce that inferences are made by using clues from the text, and our schema.  3) Write:  Students wrote their thinking in one of the boxes on their response sheet.  Here is an example of what a few of my 1st and 2nd graders were able to do.


The kids did a lot of good thinking today.  As for me,  I just roamed around the room and jotted down what students were saying.  Student #8 (below) was able to make a good inference, but I had to intervene (I) because she went straight to her background knowledge instead of using the text to verify her inference.  I made a note on the bottom to pull her for more work on using evidence from the text. (Excuse my chicken scratch.)


What I really like about the sticky notes is that I can easily group students with like needs by grouping post-its.

Also, with this system I can easily see trends within the classroom.  For example, today I noticed that several of my students were trying to infer things that were already explicitly stated in the text.  It was just really nice to see everything laid out on a single plane, so that I could get a feel for the group as a whole.  This will help guide my instruction in the days to come. 

Finally, these notes can easily be placed into my assessment binder on individual student pages as evidence of where students are with this strategy.  (This post-it above doesn't show it, but I did date each note.)  

I am going to keep up with this system and see how it goes.  I definitely liked it better than what I was doing before.  How do you keep track of your conference/observations?


Want to link up?  I am keeping the guidelines super simple:

1)  Pick one great idea that you have been wanting to try.  Maybe one shared from the Bright Ideas Blog Hop.  Click the image to get started.


2) Try it in your classroom and write a blog post about your experience.  Make sure you give credit, and a link back to the original poster of the idea!

3) Link back to this post. 

4)  Link up below.  

Can't wait to see what you all have been up to!

See ya,

Nicole


Wednesday, February 12, 2014

Gave it a Whirl Wednesday

If you all were like me, you absolutely loved the recent Bright Ideas Blog Hop.  I love seeing what others are doing in their classrooms, and freshening up my bag of teaching tricks.  But, what I usually do is see something (or in this case, great idea after great idea), get overwhelmed, and forget to try any of them.  

So, I am super inspired to start trying new things and share them with you.  So, there you have it.  The very first "Gave it a Whirl Wednesday" Linky Party.


I'm just going to pick one simple idea and "give it a whirl," and on Wednesdays (or maybe every other Wednesday - just being honest. LOL), I will share how I tweaked it and made it work for my students and me. Sounds fun.  Yes?

Even better, I invite all of you to try a Bright Idea, and link up!  See guidelines at the end of this post.

Alright the first idea I tried last week comes from Lori over at Conversations in Literacy.  As someone who is passionate about teaching kids about reading strategies, and reading for meaning, this post really spoke to me.  Her idea was "Tabletop Twitter."  Head over to her post to check out how she uses this with her 3rd grade class, and then pop back over here to see how I modified it for my 1st/2nd grade students. 


Alright, now that you are all caught up to speed, and super interested in this great idea, I will tell you what I did.

I have a 1/2 grade combo this year, so I dropped the Twitter reference to make it easier for them because I have never "tweeted" in my life. We have been working on a Heroes unit, and have already spent considerable time studying MLK.  I wanted to introduce a new piece of text on another hero, Rosa Parks.  We used this text to do our closed readings for the week.  

But, before I gave them the text.  I posted some images that I thought would allow them to use some critical reading strategies that good readers use: Making Connections and Questioning.  I used Google images to find photos that I thought were thought provoking, and would allow students to dig into their background knowledge and connect to some big ideas that we have been learning about.  


I also included one quote from Rosa Parks that I thought would bring about an interesting discussion.


We did a carousel, meaning that students rotated from one poster to another in groups.  First, students were given time to think about the image, and discuss it with their small group.  Then, they were asked to write 1) a question, 2) a comment, or 3) a connection.  For accountability, I asked students to put their student number after their writing.


So this is a sampling of what I got from my little smarties.  

Love this connection to previous learning!


While the kids were writing, I went around and put a star next to my favorites.  This really encouraged my kids to do their best thinking. But, you will have to use it with caution.  I stressed to my students that I would only give stars to original thoughts.  So that took care of any ideas some kids might have had, to copy a comment that was already starred.


This comment sparked a great discussion about how Rosa wasn't just tired of giving up her seat, but of all the ways she and African Americans were being treated unfairly.


Some other great pics I used.


After the carousel, all the posters were pinned up in our meeting area. The kids referred back to them often as we did each reading of the text.  I am so proud of my students!

The next step for us was, now that we have finished reading the text, I had the kids go back and add new questions, comments, and connections.  I gave the kids colored pencils to do this, so that I can distinguish their thinking before reading and after reading.  I was hoping to see richer more complex thinking, and that kids were really getting the big ideas.  

And I really did see a lot of good info on the posters.


The problem was that most of my kids already knew many of the big ideas contained in this text, so there wasn't enough new info to see a big difference from before and after.  Text choice is key here.

In summary:  This lesson would work especially great if used at the beginning of a unit on a topic the kids did not have a lot of schema about. Ah, live and learn. I saw a great quote posted by a friend this week. "There are no mistakes.  Only lessons."  Lesson learned.

I hope you got some new ideas about how to use Lori's great "Tabletop Twitter" idea, and will come back next "Gave it a Whirl Wednesday."

Want to link up?  I am keeping the guidelines super simple:

1)  Pick one great idea that you have been wanting to try.  Maybe one shared from the Bright Ideas Blog Hop.  Click the image to get started.


2) Try it in your classroom and write a blog post about your experience.  Make sure you give credit, and a link back to the original poster of the idea!

3) Link back to this post. 

4)  Link up below.  

Can't wait to see what you all have been up to!

See ya,

Nicole


LinkWithin

Related Posts Plugin for WordPress, Blogger...