Sunday, April 29, 2012

3D Shapes Review

I have to say, I love teaching 3D shapes every year to my second graders.  Along with money, they are my favorite two units that we work on.  We handle miniature 3D shapes that our grade level purchased  with grant money.  We fold and tape nets into various 3D figures.  I think I enjoy it because it lends itself to so many hands-on experiences for my students. 

But right now is "crunch" time.  We are in review mode, as we are only two weeks away from our state test.  Yes, I work in California, and we test and torture little, innocent, second graders here.  Anyway, I could go on, but I won't.

So, I love foldables, too.  But, I don't have it down to where I can just help my kiddos whip up 27 7-page foldables so that we can review 3D shapes.  Maybe you don't either.  I created this flip book for us.  Click on any of the images to take a closer look.


The flip book covers spheres, cones, cubes, cylinders, pyramids, and rectangular prisms.  It also has illustrated examples to explain the vocabulary of 3D shapes:  vertices, edges, and faces. 


This book has students circling vertices, highlighting edges, and counting faces.  For counting faces, we count the number of squares, rectangles, circles, and triangles that we see.  We mark the total onto the tally chart on each page.  This is helpful, because on our state test, students must know what plane shapes make up the faces of each 3D shape.


Finally, I also included a cut and sort sheet with images of real world objects.  The students have to cut and paste them on the correct page.


You can find this flip book in my Tpt store here.

Hope you are having a great weekend.  Today's my 12th wedding anniversary!
Friday, April 27, 2012

Sharing is Caring...or in other words, another Freebie!

Well, I know that many of you are in the thick of testing right now.  We all feel your pain.  I am only 2 weeks away  from being right where you are.  So, I thought I would share something I did last year during testing time, that really seemed to make a difference in the quality of my students' work on the test. 

So here is another Freebie!  Because you know?  Sharing is caring.

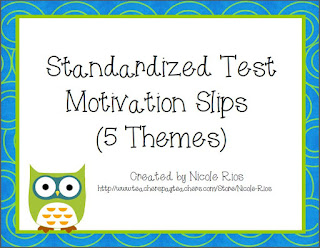
These are testing motivation slips that I used last year, after a fellow teacher mentioned the idea.  Except, last year I just cut up some construction paper into bookmark size pieces.  So these are a lot cuter!  You can download these by clicking the images below.


So what I did was tell the kids that while they were testing, I would be walking around and monitoring their work.  Every time I saw someone using a good testing strategy, I would give them a stamp (you could do stickers) on their testing slip.  Whoever had 10 stamps/stickers at the end of testing would be part of our "I Did My Best on the Test!" pizza party celebration. Of course, you can make it any type of reward that works for both you, and your students.

Here are some tips for using these slips:

1)  Emphasize to students that they are not receiving stamps for correct answers.  A stamp does not mean they have the right answer.  It just means that they are showing you that they are trying to do their best.

2)  Some things that I was looking for were: 
  • underlining and/or referring back to  the text to answer comprehension questions
  • taking their time
  • checking their work
  • showing all their work and/or thinking
  • using any tips or strategies we had learned during the school year (For example:  lightly crossing off any wrong answers, etc...)
I found these slips to be a fun way to get greater testing "buy-in" from my students.  I have to say, the quality of their effort improved drastically.  I hope you will find these helpful. 

I would love to hear from you as well.  How do you get your kids "geared up" and invested during  standardized testing? 

Enjoy and happy Friday, 

Wednesday, April 25, 2012

Reading Aerobics

Even though I teach second grade, I often find myself working with students with little understanding of letters and sounds.  At our school, we have adopted a wonderful program called SIPPS (Systematic Instruction in Phoneme Awareness, Phonics, and Sight Words) created by reading guru Dr. John Shefelbine.  I love this program, and have seen huge progress from my struggling readers in the areas of phonemic awareness, phonics, and fluency.   This program is essentially, reading aerobics.  Everyday we review sound/letter connections, manipulate phonemes, segment, and blend.  It's quite a workout, but for a teacher, completely manageable. 

Anyway, because of this program, I am always on the lookout for ways to incorporate more phonemic awareness exercises into our day.  It is a bonus if I can make these activities fun for the students.  I stumbled across many "I Have, Who Has" games on TPT.  They all involved reading words, but didn't go any deeper than that.  So, I created my own.  I have created two so far MANY, and a FREEBIE that you can catch at the end of this post.  The first one focuses on segmenting and blending CVC words. The second, on segmenting and blending words with digraphs.  Click the images below to take a closer look:


Ok, so here is where I have to say something about my first experience with "I Have, Who Has".  I absolutely hated it!  Billy didn't pay attention.  Bobby didn't speak loudly enough. Bonnie thought Billy said "rib" instead of "rid".  Oh great!  Now we were off by several cards.  I almost tossed the whole thing into the circular file.  (By the way, I have neither a Bonnie, Billy, nor a Bobby in my class.)

Thankfully, I am a stubborn woman.  I reflected on what had gone wrong.  I started thinking of ways to tweak the activity to solve the obvious problems.  We tried it again the next day.  Oh my goodness!  We LOVED it! They wanted to know when we were going to do it again.  Sigh.  Happiness.  Everything is right in the world once more.

So here are just a couple of tips for any teacher out there who decides to pick up an "I Have, Who Has" game. 

  • First, be patient and persistent.  These things, like most, take time and practice.

  • Second,  spend some time really teaching your students about segmenting and blending.  All of my games have posters, and a sort activity, that teaches  students the difference between "Stop" sounds and "Continuous" sounds.

  • Third, I think having the kids sit in a circle is best.  It allows students to see the reader's mouth when they are segmenting a word, thus reducing  confusion between sounds that are similar (p, d, t, b).

  • Fourth, find/create a game that has a master list of all the words in order.  That way you know if the kids have gotten off track before you reach the end of the game.  What!  Six people didn't get to read their card?  Oh, brother. (Yep, all my games have one!)

  • Lastly,  model and insist that students speak loudly and clearly.

These little lessons have made a huge difference for my students,  and for me.  I think activities like this are fun, and worthwhile, for our students.  I hope you will, too.

Here is a freebie, to get your started. Enjoy!


Looking for more phonemic awareness activities? Follow me on Pinterest!

Happy Wednesday!

Monday, April 23, 2012

Post Earth Day Guilt

I  was thinking about  re-using and recycling today.  Call it post Earth Day guilt.  Anyway, I remembered a project that I used to make to recognize my students' birthdays.  Now, I don't know about you, but spending my birthday at school is not exactly my favorite way to celebrate my big day.  Well, our students feel the same way! 

Now, I know I did not invent this, and maybe you've seen it before...but it is always good to review these things.  I present.... wait for it.........paper towel roll and tissue box birthday gifts!  You're sceptical, I see.  Read on.


Mrs Rios Teaches: Quick and Easy Student Birthday Gift

So if you have never seen these before, here is what you will need:  paper towel rolls and/or empty tissue boxes (I have a gazillion of these during flu season), scissors, tape, ribbon or yarn, tissue paper, construction or wrapping paper, and little treats or surprises to put into the containers.  Here is a photo for the visual learners, like myself:

Mrs Rios Teaches: Quick and Easy Student Birthday Gift

I love these little gifts because who doesn't like to open a wrapped gift?  It just feels special, and I want my students to feel special on their big day.  All you have to do is fill them with whatever treats you like.  I usually put in a bookmark, pencil, and a No Homework pass.  I don't put in candy anymore.   In the past, I  had my parent volunteer make these at the end of the school year for my next year's class. However, have you ever had year-old chocolate? Bleh!  Forgive me, June babies.

Moving on.  Wrap them with whatever paper you have handy and tie them off with ribbon or yarn.  I usually always have remnants from old projects in my art closet. When you are done, they will look something like this:

Mrs Rios Teaches: Quick and Easy Student Birthday Gift

Mrs Rios Teaches: Quick and Easy Student Birthday Gift

Now I ask you, who wouldn't want to come to school on the one day of the year that celebrates their very existence, to find one of these little lovelies on their desk?  Exactly.  Best Teacher Ever Award goes to YOU!

Need more ideas?  Head over to Sunny Days in Second Grade by clicking the image below.


Have a great week!

Friday, April 20, 2012

A Friday Freebie for Followers

I hope everyone has had a great week and is looking forward to the weekend.  In honor of our much beloved Saturday and Sunday, I am posting my first freebie down below! 

But first, let's talk grammar instruction!


Should you teach it? When? And how much?


This is a highly debated topic. But, here are some thoughts:


Effective, authentic, and meaningful ideas for teaching young writers about grammar.

1) Teach grammar through writing: 

I am encouraged to hear that entire class periods of diagramming sentences is going by the wayside. Ugh! I can't think of a faster way to kill any sense of joy with regards to words, writing, and language. Honestly. I speak from experience, here.


In my opinion, parts of speech and grammar should be learned through....wait for it..... reading and writing! I know...mind-blowing.


First and foremost, I believe young writers should be encouraged to get their ideas, and voices, onto their paper. The mechanics of language will emerge as a natural concern because, as an author with something to say, he/she is going to want people to be able to understand what they've written. But, first your students must see writing as a true form of meaningful communication. 


2) Target your lessons:


Focus your direct instruction on problems that you see in your students' writing. These lessons can be done whole group, small group, or during your writing conferences. Giving feedback that is timely, relevant, and that the students can immediately apply in their own writing, is the very essence of powerful teaching!


For example, I know what Common Core wants me to teach my 2nd graders. But, I work with a large population of English Language Learners. Therefore, much of my "grammar instruction" is focused around explicitly teaching my students how the English language structure is often very different from their home language.


3) Read to your students

Exposing your students to the best of literature is imperative. Pick books that are just above their independent level. We want to keep nudging our students forward, but they must be able to understand the reading, in order to be able to analyze the writer's moves, and then subsequently, make some attempt to approximate what they've heard, in their own writing.

Here are some mentor text suggestions for showing students about the way words work. (affiliate links included)

Nouns and Verbs:


Effective, authentic, and meaningful ideas for teaching young writers about grammar.

Effective, authentic, and meaningful ideas for teaching young writers about grammar.

Adjectives:

Effective, authentic, and meaningful ideas for teaching young writers about grammar.

Effective, authentic, and meaningful ideas for teaching young writers about grammar.


Adverbs:

Mrs. Rios Teaches: Effective, authentic, and meaningful ideas and activities for teaching young writers about grammar / parts of speech.

Effective, authentic, and meaningful ideas for teaching young writers about grammar.


4) Give students lots of practice!

I'm not talking about written practice, here. I mean lots of oral practice. All students need significant amounts of practice using language to communicate with others. Get in the habit of having students plan and rehearse what they will write, before they actually pick up a pencil or pen. Lucy Calkins calls this "writing across your fingers." It is a highly effective practice that allows you to listen in, encourage, and correct, if necessary, before your students invest themselves on paper. 

If you hear a few of your students misplacing adjectives (as my Spanish speakers often do), pull a small group during your writing workshop time, and do a small group lesson. It has been said that the "easiest revisions happen before the writing even begins." I believe this is absolutely true. (What's more, they are the least painful for our budding little authors.)

I will leave you with one more saying, just in case you're not sold yet: "What students can say, they can write." Ok, moving on.

5) Encourage students to play with words

Encouraging your students to notice and collect words is a wonderful practice, as well. Have students keep lists of words that they notice and love. Encourage them to manipulate, substitute, and insert words until the meaning they are writing towards, is achieved.

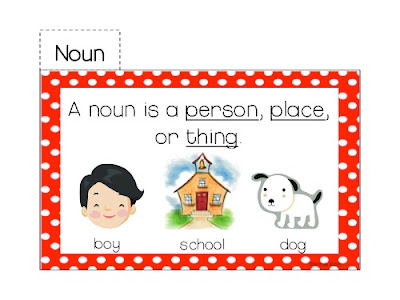
My daughter came home last year with a little mini-word wall.  I saved it, thinking that one day I would do something like it with my own students.  A couple of hours later, and oila...a Parts of Speech Flip Book for the primary grades! It is my most downloaded resource of all time with over 305,000 downloads! (Best of all...it's a free download for you! Just click any of the images below to get your copy.)


Effective, authentic, and meaningful ideas for teaching young writers about grammar.

The free flip book covers nouns, verbs, adjectives, and pronouns. (Looking for adverbs, too? Keep reading.)  In the past, I used the cover page for each part of speech as a springboard for a mini-lesson, and then we ended by coming up with some example words together to put on the write-in pages.  Finally, I wrapped it up by having the students go on a "word hunt" in their reading books for more examples of that part of speech.  

But now, we use it more as a place to collect words that we love. Words that we aspire to use in our own writing.

Here are some sample pages:

Update: 1/30/16
Effective, authentic, and meaningful ideas for teaching young writers about grammar.
Looking for adverbs? I have an "adverbs" tab in the full-sized version of this flip book, along with linking verbs, and a whole lot more. The full-sized version is also super quick to put together, as it requires less cutting. Check it out by clicking below!

Effective, authentic, and meaningful ideas for teaching young writers about grammar.

Looking for more ideas for grammar instruction? Check out my Grammar Pinterest Board below.


Enjoy, and happy weekend.

Nicole

Tuesday, April 17, 2012

Multiplication Monday

Multiplication Monday

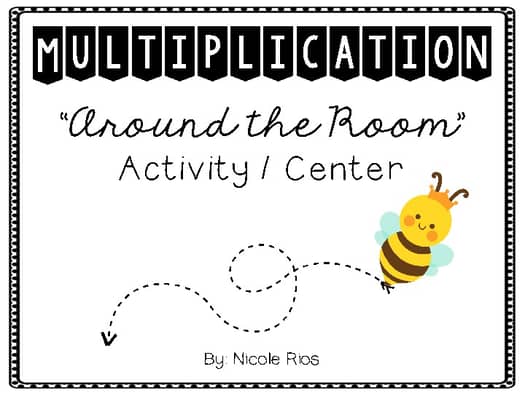
So we have been working on multiplication for a couple of weeks.  We have done "Circles and Stars", cut and pasted arrays, and practiced using multiplication to solve repeated addition problems.  This Monday, we did a "Multiplication Around the Room" activity.  I used it as kind of a pre-test, informal assessment, to see where the kids were at.  I love any activity that gets my students moving and speaking about math.  I enjoy listening to their conversations, and seeing if they are using their math vocabulary to clarify and explain their thinking.  This activity provides a fun opportunity for students to do just that.  Take a look:

Mrs. Rios Teaches: Multiplication Around the Room Activity and Center

I just print, cut, and hang the station cards around the room.  I don't own a laminator, so I just dropped them into a plastic page protector until I can get to my local teacher store.

Rotation card inside sheet protector

The kids had a great time moving around the room and writing the multiplication number sentence that was represented on each of the 20 station cards.  I plan to do a lot more of these type of activities after our state test in May.  They will have a lot of energy to release after that, and activities like this might just save what is left of my sanity.  If you are interested, you can find this activity HERE in my TPT store.  

Looking for more fun math ideas? Follow me on Pinterest!


Have a great week!

Sunday, April 15, 2012

Is Monday Here Yet?

Oh my goodness!  Have you ever had a weekend that made you wish for Monday?  It all started yesterday when we noticed our rescue dog, Jack, acting strangely.  He was sleepy and lethargic.  By the time we decided to act, all the vets around were gone for the day.  So, we I took him to the emergency vet hospital (aka:  you are going to spend a lot of money here, and there is nothing you can do about it).  Come to find out that our poor little puppy had eaten one of my son's Legos and it had become lodged in the back of his jaw.  It must have been very uncomfortable for him.  Well, $350 dollars and 3 hours later, we walked back in the door from the ordeal.  But, I am exhausted, as I had to get up every 3 hours to give him his antibiotics, pain meds, and irrigate the wound (which he decidedly does NOT enjoy).  Here is a picture of the guilty party:

Well, at least one of us feels rested.  As for me, I am looking forward to Monday.  I have a new multiplication item that I worked on this weekend, and I am excited to see how it goes with my students.  Wish me luck. 

Nicole

Saturday, April 14, 2012

A Work in Progress....but aren't we all?


As I type these first words, I am realizing that I am officially a blogger.  I am so excited.  Well, actually... "no",  I think it could be more anxious.  Maybe, even nauseous.  I get those two confused all the time.  But, I will push through my blogging reservations to complete my first post.  

Breathe.....ok....here I go:

This blog, my life, and my teaching are a work in progress.  I hope to share what I have learned in my 17 years of teaching, as well as, what I am learning on a day-to-day basis about myself, my students, and my profession.  

Now, I am a little worried that my blog title might lead people to believe I am a bit narcissistic, but actually, every darn, cute phrase with the word "second" or "2nd" was grabbed up long ago.  Trust me, I looked.  

I am actually just a humble mom of two wonderful children, a wife of almost 12 years, a "foodie" (aka: a food snob), a hiker and lover of all things outdoors, and a teacher who has been teaching 2nd grade for 8 years and absolutely loves it!

I am excited to meet and talk with all of you classroom warriors and heroes out there.  So, pardon my dust...and let's talk teaching!

Ok, that wasn't too bad.  I think I can do this.

Nicole

LinkWithin

Related Posts Plugin for WordPress, Blogger...